

The CF Bedford Rebuild Begins
Part 5: The sand blasting results

With the roof chop and a lot of the rust repairs done (for structal strength) the Bedford van was line towed to the sand blasters, good thing they were just around the corner :)
Notice the front bumper lol, was large bit of hard foam just in case as it only had a handbrake for brakes.
We tried to bleed up the brakes but booster brakes and a leaking master clyinder don't help much.
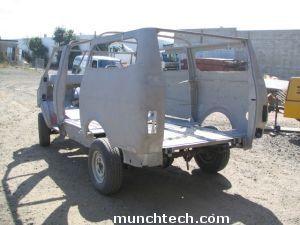
As you can see just about every panel was removed, the sills, guards, lower rear panels, roof, back panels (inner and outer), tubs, inner visor, top outer windscreen frame ... as the van was rusty on the outside I knew it would also be on the inside, so needed to start back to basics really.
There is no panel or part of which couldn't be got from one side or the other. Some folks might notice there is no bracing visible. There was some but we took it out to make it easier for the sandblaster. I'd be making sure it was square before the rebuild.
Ever seen a naked CF Bedford van? Well you have now ...

Lets put some clothes on it, well ok not clothes but a PA10 type thing, it's not PA10 as such, it's an etch/rust exhibitor - better than PA10.

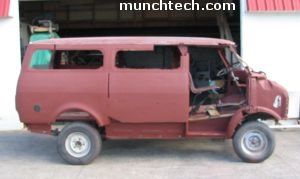
This last picture makes it look like a chopped Chevy van. Look close and you can see the seat I sat in while we towed it, it was secure, was screwed down but was to high to sit in straight.
The sand blasting found more unexpected rust, the side panel behind the drivers door has rust in the middle of the panel (where the braces are), with the rust already cut out of the side, bottom and needing the top it's going to be easier to make a new panel than repair that one.
From these pictures you should be able to see the top windscreen panels are missing and also the drivers windscreen pillar, they were beyond repair so will be remade from sheet steel (have used two sheets so far, another two on order).
Apart from the side panel the other surprises were minimal, a few dents and things but nothing major. The end is in site - or is it?
It will look a whole lot better once the suspension is lowered but for now it's a good work height.